This procedure is for setting up newly acquired device which would opt for the device management scheme, see Device management by Microsoft Endpoint Managment (Intune).
- For existing device in-use and not AD joined, please refer to the "To join an already configured Windows 10/11 device" section here.
Steps to be performed by device user (who must possess a valid ITSC staff account)
- Install Windows 11 Home on device (May take about 30-45 min)
- Upgrade to Enterprise edition and Reset Computer (May take about 45-60 min)
- Install Windows 11 Enterprise and enroll the device using ITSC account of the device user (May take about 15-30 min)
- Assign the category of the device under the department of the device user
A. Install Windows 11 Home on the device
As most newly purchased devices come with Windows 11 Home edition, you may need to create a personal Microsoft account to proceed installation. Just follow the setup instructions of Windows 11. If your device is already installed with Windows 11 Professional / Enterprise editions, you may go directly to enroll the device using ITSC account.
Here are some points to note when installing:
-
Network Connection during installation
- For wireless connection, please refer to On-Campus WI-FI connection for campus community
- For wired connection, in office area, plug-in network cable. ITSC will provide limited network access that allows Windows 11 installation to complete. Upon successful login to device desktop, user must complete node registration before resuming normal network access.
-
Name your device during installation
During installation, you'll be given an option to name your device. The computer name that you provided here doesn't matter at this point. Just press "Skip for now" to proceed.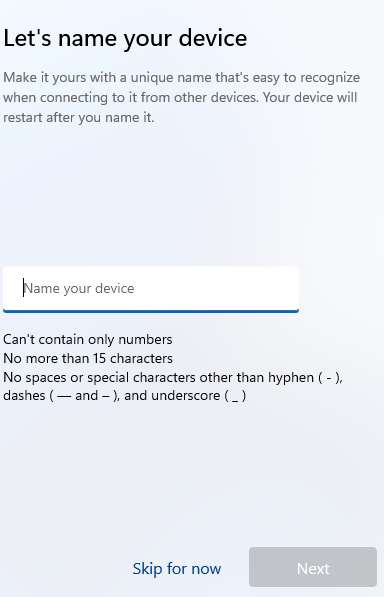
-
Windows 11 Microsoft Account registration during installation
Windows 11 installation process requires registration using personal Microsoft account before one can access the computer desktop. This personal Microsoft account will store BitLocker recovery key for future disk recovery. See
Here you can have three options:- Create a new personal Microsoft account by clicking "Create One!". You may then use this account for your own personal use, like registering your devices at home. ITSC strongly suggest NOT to use your campus network account to create personal Microsoft account as it may cause confusion in future.
- Sign in with an existing personal Microsoft account that you possess.
- Sign in using a shared personal Microsoft account possessed by your departmental support.
-
Create PIN, Bioinformatic Authentication, Restore from Device, and Microsoft 365
- The PIN you created during Windows 11 Home installation procedure is just usable in that particular device. It gives you a password-less login experience. You may just create a six-digits PIN for this device.
- You may by-pass bioinformatic authentication setting at this point as you may need to do it again when you use ITSC account for the device in future.
- DO NOT restore from other device. This option will restore settings of your personal Microsoft account from other devices. However, you shouldn't use personal Microsoft account to login the device after enrolling Intune management.
You may just select "Setup as new device"
- You may just press "Decline" when you are given an option to purchase Microsoft 365. Once you login using your ITSC account in future, you can automatically access Microsoft 365 without purchasing.

-
Node Registration for wired connection device
By now, you should be able to access the Windows desktop. First thing first, if you are using wired connection for your installation, you should now perform node registration in order to gain access to full network access.
B. Upgrade to Enterprise edition and Reset Computer
To enroll Intune management, Windows devices must of of Professional or Enterprise version. To do so:
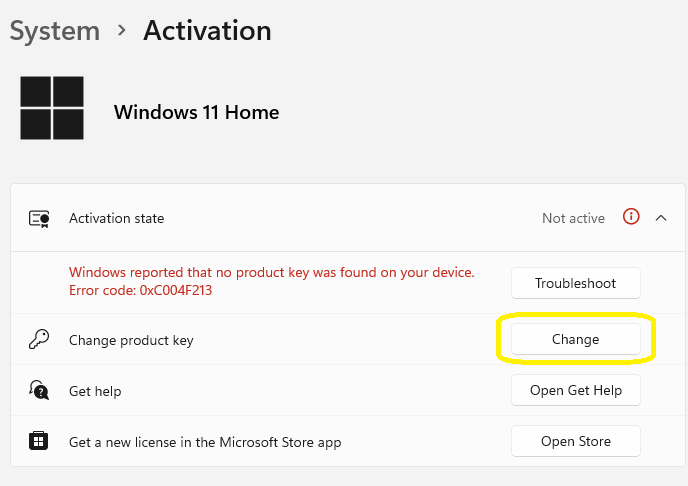
- Open "Settings", "System", "Activation". Make sure your device's Windows version is Windows 11 Home, then at the "Change product key" row, click "Change"
- Now, at the "Enter a product key" dialog, enter the Windows 11 Enterprise KMS setup key
NPPR9-FWDCX-D2C8J-H872K-2YT43 or a MAK key, and then click "Next"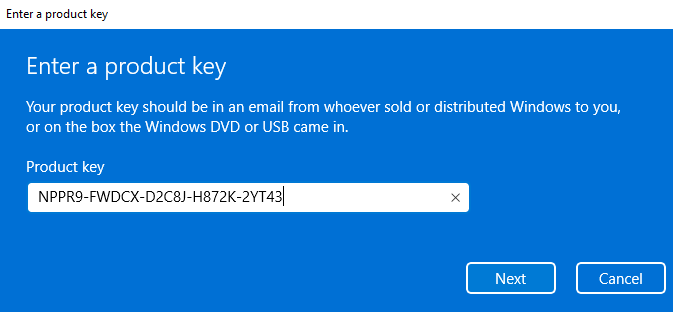
- You'll then be prompt to upgrade your edition of Windows, just press "Start" to begin upgrade process.
- The upgrade process may take a few minutes and your device will restart after upgrade.
Upon successful upgrade and restart, your device version will now be Windows 11 Enterprise. At this point, ITSC highly recommend to reset the device to factory default due to the following reasons:
- The reset action will regenerate the BitLocker key of the device and store it in the Corporate Account. This would make future device maintenance or device transfer much easier.
- The personal Microsoft account that was used to register Windows 11 Home will be reset. Personal data of that account will be erased. OneDrive backup using personal Microsoft Account will also be reset.
- In case you use a personal Microsoft account for just device installation, you may not manage that account securely. It may cause future recovery a great trouble as you need to get back the Bitlocker key.
To perform device reset:
- Open "Settings", "System", "Recovery", Click "Reset PC".

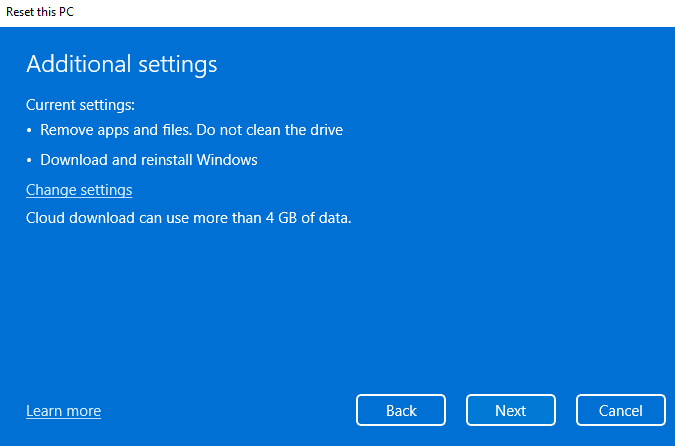
- Select "Remove everything".

- Select "Cloud download". This will give you the latest version of Windows 11 Enterprise.
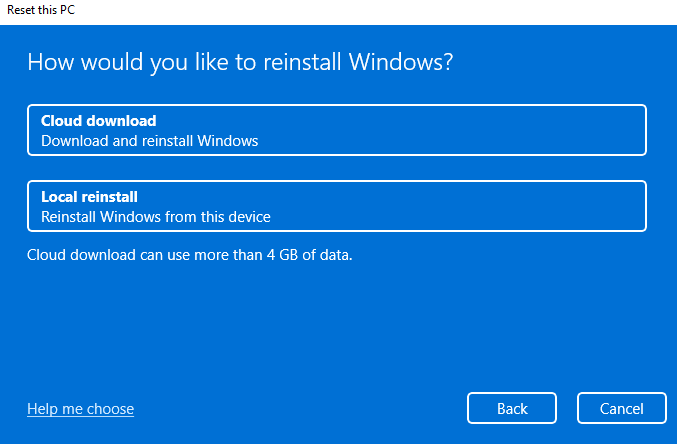
- Click "Next" to proceed.
- Finally, click "Reset" to reset the computer and make it as freshly installed Windows 11 Enterprise.
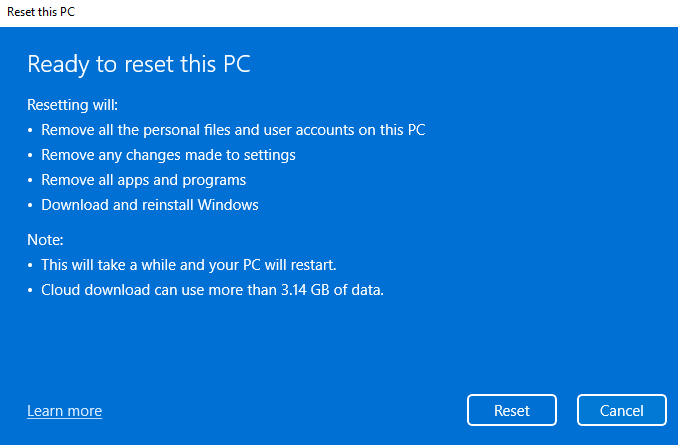
- Now, wait the system to reset your device. This process may take around 45-60 min. When finished, the device will reboot into new installation interface.
C. Install Windows 11 Enterprise and Enroll the device using ITSC account of the device user
Following the set up instructions of Windows 11 Enterprise
- Follow the set up instructions
-
At the prompt "Let's set things up for your work or school", enter your ITSC credentials (i.e., johnchan@ust.hk) and complete the MFA challenge using DUO mobile (or other registered authentication methods)
Note that the account you provided here will be the owner and administrator of the device. The new Bitlocker key will be stored under this account's devices.
- Wait until the installation completed and follow the set up instructions
The device is now successfully enrolled to the Microsoft Endpoint Manager (previously known as Intune). This could be verified by checking the presence of "Managed by HKUST - Info" under "Settings", "Accounts", "Access work or school", "Connected to HKUST's Azure AD".

The device will have arbitrary computer name like "DESKTOP-ABCDEFG" or "LAPTOP-ABCDEFG". ITSC imposes no restriction on computer name for new Windows 10/11 devices enrolling to Intune. However, we strongly recommend to change your device name at this stage. By changing device name now will give you ease to manage devices. Also, it'll help to locate the device should there be security alerts raised in future. ITSC would like to suggest using one of the following naming convention:
- [dept]-[Abbreviation]-[sequence] (e.g. ITSC-P-001 for personal 001, ITSC-T-001 for team 001)
To do so, in "Settings", "System", "About", click "Rename this PC".
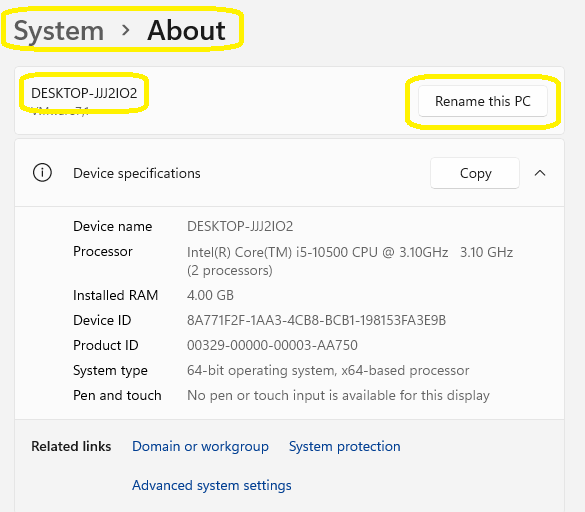
After renaming PC, a reboot is required to make changes effective.
D. Assign the device category under the department of the device user
- Open Microsoft Edge
- Go to https://portal.manage.microsoft.com/devices
- Select the device that was just finished setup.
- Select "Category is unknown. Tap to select now."

- then confirm the device category (i.e., the department abbreviation of the device user. For instance, ITSC).
Note that the device category is not sorted in orders. You have to search it carefully and select the correct department.
- Scroll to the bottom and click "Select". You may use the device meanwhile.
- Around 10 minutes later, you'll see a dialog "You're about to be signed out". Your device is now properly configured with Microsoft Endpoint Manager and awaiting restart.
- Restart the device to finish Microsoft Endpoint Manager configuration.
- Logon the device using ITSC credentials (i.e., johnchan@ust.hk) and you may use the device for your work.
The device is now successfully enrolled to the Microsoft Defender for Endpoint, or MDE (previously known as Advanced Threat Protection, or ATP). This could be verified by checking the presence of "ITSC Support" under the "Windows Security" application page.