Step-by-step guide to install Windows 11 Professional from USB
This procedure is for installing Windows 11 Professional from USB using the official image with modification. After following this procedure, the devices would be eligible for the device management scheme managed by ITSC, see Device management by Microsoft Endpoint manager (Intune).
Content
A. Prepare the USB
- Acquire an USB drive with at least 8 GB in storage
- Note: All data in the USB would be destroyed to create the installation media
B. Burn the official image to the USB
Using a device with local admin privilege:
- From a browser, visit the website https://www.microsoft.com/en-hk/software-download/windows11
- Click "Download Now" under "Download Windows 11 Disk Image (ISO)" to download the disk image file
- Using Rufus (https://github.com/pbatard/rufus/releases/download/v3.17/rufus-3.17p.exe), create the bootable USB

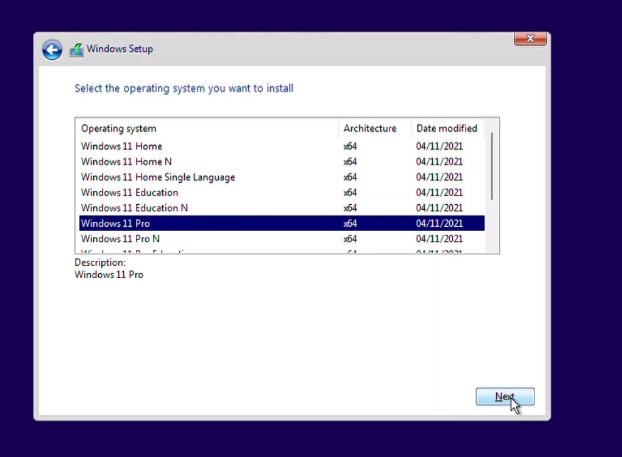
C. Enable Windows edition selection for the installation
- Write a file named "ei.cfg" with the following content and save it in the bootable USB under the source folder (i.e., E:\sources)


- Note: If the ei.cfg file is not configured properly in the USB, this option may not appear
D. Boot the device from USB and follow the installation steps
- Insert the USB
- Power on the device, and then go to the boot menu (usually could be accessed by tapping the F12 function key rapidly upon the logo screen during start up)
- Select the USB to boot the device from the USB
- Follow the steps outlined in Video demo for setting up new device to join AAD
Note:
- If the bootable USB is not detected, please check if USB is allowed in the BIOS/UEFI. Enable it if it is disabled.
- If the drive partitions are not found in the installation menu, please install the required drivers. This may be caused by the driver requirement of the Intel 11th generation processors for Windows installation (see Intel 11th Generation Processors, No Drives Can Be Found During Windows 10 and Windows 11 Installation | Dell Hong Kong ).
- For For Dell OptiPlex 7090, the IRST driver could be downloaded here. It would need to be executed to extract the driver files to a USB (this can be the same USB with the Windows 11 ISO extract). This USB would be inserted to the PC to load the driver files during the installation.
- Alternatively, one may configure the SATA Operations under the storage section of BIOS/UEFI to AHCI.